September 01, 2013 Unknown
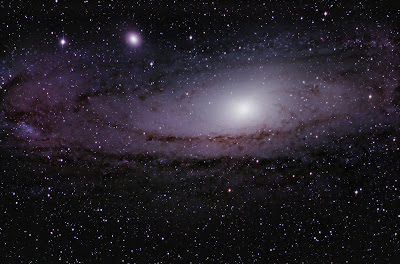
I think this has to be my favourite image so far - captured last night from my back garden using my astro-moddified Canon EOS 1000D, attached to my Sky-Watcher Explorer 190MN Pro. The image is of our close neighbour - the Andromeda Galaxy (M31) - and is the result of almost 90 minutes of exposures (5 x 5min + 30 x 2min), aligned and stacked using
Nebulosity 3 and processed using
Adobe Photoshop CS6.
 |
| The Andomeda Galaxy (M31) |
|
Having initially aligned and stacked the images in
Nebulosity 3, I exported the stacked image as a 16 bit TIFF file so that I can process it in
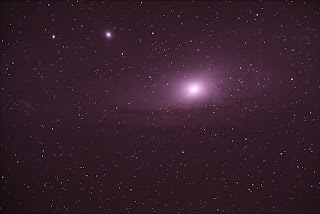
Adobe Photoshop CS6 - it is important to remember that at this stage the majority of the finer detail is obscured, so we need to do some tweaking in order to get a nice clean result.
 |
| Unprocessed image of M31 after initial alignment and stacking |
Without going into too much detail, there are a several stages that we need to perform on this image in order to get it to look like the one at the top of this post. Many thanks to
Neil Heacock for sharing his workflow online for others to use.
- Adjust levels and curves - effectively, we want to ensure the image is not clipped whilst enhancing the lighter areas of the image so they show up more in contrast to the darker background.
- Apply gradient filter - I use Russell Croman's Gradient XTerminator, which is a paid-for plug-in filter for Adobe Photoshop CS6. This basically reduces vignetting in the image that can result in significant colour gradient across the image - especially in the corners.
- Apply Local Contrast Enhancement action - this is the first of Noel Carboni's Astronomy Tools for Photoshop. Again, you'll need to purchase these tools, that are effectively a set of pre-programmed actions, but they are an invaluable tool and will deliver excellent results whilst saving you significant time and effort. The purpose of running the Local Contrast Enhancement action is to enhance the contrast between the cloudy elements of the galaxy and the darker dust lanes.
- Apply Enhance DSO Reduce Stars action - another of Noel Carboni's tools, this one increases the lighter areas of nebulosity without increasing the brighter portions of the image, increasing brightness without over exposing the stars.
- Increase Saturation - this enhances the colour of stars and dust lanes in the galaxy. be careful not to go overboard with this - you do not want the image looking over processed.
- Apply Noise Reduction. Another of Noel Carboni's tools - I told you they were invaluable. There are two versions available in his set of tools. Space Noise Reduction (SNR) and Deep Space Noise Reduction (DSNR). SNR will reduce the effect of noise across the entire image, whilst DSNR will leave the brighter areas alone and just reduce the effect of noise in the background. In the image above I used SNR initially, as I had a little noise in the nebulosity, then ran DSNR to further reduce the noise in the background.
- Apply the Smart Sharpen filter - if applied to the highlights, whilst filtering the shadow areas, this filter does a nice job of sharpening the detail in the nebulosity and dust lanes without re-adding noise to the overall image.
- Apply Less Crunchy More Fuzzy action - the last of Noel Carboni's tools that we need for this image, this adds a little blur to the nebulosity areas, adding the final layer of polish to your image.


This is interesting, but I would like to see how to do this using just free open-source tools. The skies are free—no one should have to pay for astronomy software.
ReplyDeleteThere is a lot of free software available online for control of the telescope (EQMOD), camera control (Firecapture), Plate Solving (AstroTortilla) and guiding (PHD). I have also found free software for stacking (Deep Sky Stacker) and Planetary Image Processing (AutoStakkert 2 and Registax). Apple Photo app can do very basic editing but you really need an advanced editing programme to get the most out of an image and for that you either need Photoshop or PixInsight - both expensive.
Delete