
Fixing Jupiter's Rotation in Stellarium
I really like Stellarium, having recently started using it to control my scope through EQMod. It is great for scanning the night sky for suitable targets and even lets you zoom in to the planets to see the location of their moons. What i didn't realise, until recently, is that the surface image of Jupiter showing the Great Red Spot (GRS) does not tie in with the real time rotation of the planet - how frustrating! However, last night I discovered a work-around that allows you to adjust the rotation speed of the image in Stellarium to correspond with real time, meaning you can use this excellent planetarium software to predict the best time for observing GRS transits.
Many thanks to Dion (of AstronomyShed fame) who provided the original instructions on the East Midlands Stargazers website http://www.eastmidlandsstargazers.org.uk/topic/198-grs-in-stellarium/
I have made a slight amendment based on my own system - Windows 7 Ultimate and Stellarium 0.13.1.
Firstly, download a program called 'notepad++' as this is far better for editing code. If you use the default text editor you just end up with a large block of code that is difficult to decipher. Notepad++ can be downloaded from here :-
http://notepad-plus-plus.org/
Once installed, you're going to just have a quick check of a website for transit times, so put in your correct time zone here :-
http://www.skyandtel...html?page=1&c=y
This will tell you when the red spot transits Jupiters meridian, ie, it's in the middle. So make a note of the times, all you need this for is to double check your edits have worked ok.
Next, go to the following location on your hard drive:
C:Users\<folder with computer name or your name>\AppData\Roaming\Stellarium\data
In the data folder you will have a file called ssystem.ini
Right click it and select "edit with notepad++"
Scroll down the list and you will see a section that looks like this :-
The part you want, is "rot_rotation_offset = 250".
Change the '250' to '65' and then at the top left in notepad++ click FILE and then SAVE. Close notepad++ and start stellarium.
**Please note that Dion successfully used the figure of 105, and other users have found different figures that worked for them, so a bit of trial and error may be required. However, I eventually came up with the figure of 65 that worked for me**
Advance the time in stellarium to a time when the above site says there should be a transit, zoom in on Jupiter in Stellarium and now the GRS should be placed around the middle.
All done
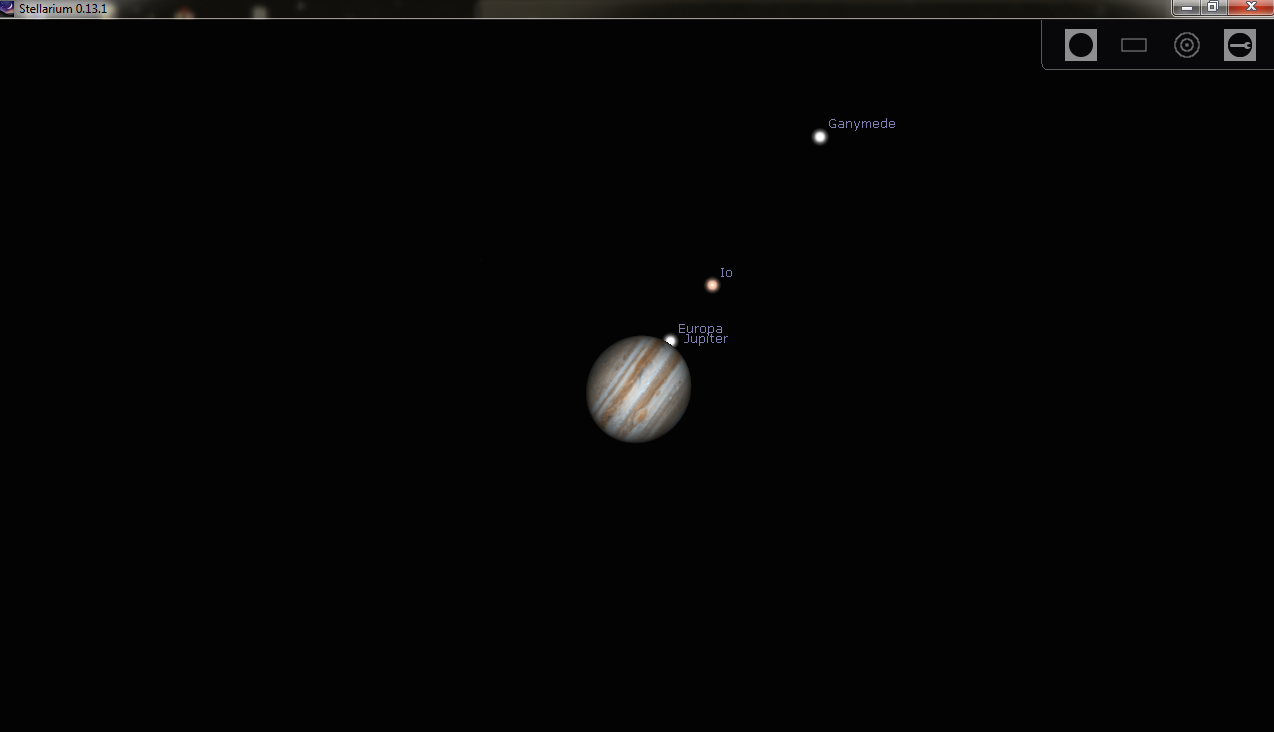 |
| A Stellarium screenshot showing Jupiter, her moons and the Great Red Spot transit |
Many thanks to Dion (of AstronomyShed fame) who provided the original instructions on the East Midlands Stargazers website http://www.eastmidlandsstargazers.org.uk/topic/198-grs-in-stellarium/
I have made a slight amendment based on my own system - Windows 7 Ultimate and Stellarium 0.13.1.
Firstly, download a program called 'notepad++' as this is far better for editing code. If you use the default text editor you just end up with a large block of code that is difficult to decipher. Notepad++ can be downloaded from here :-
http://notepad-plus-plus.org/
Once installed, you're going to just have a quick check of a website for transit times, so put in your correct time zone here :-
http://www.skyandtel...html?page=1&c=y
This will tell you when the red spot transits Jupiters meridian, ie, it's in the middle. So make a note of the times, all you need this for is to double check your edits have worked ok.
Next, go to the following location on your hard drive:
C:Users\<folder with computer name or your name>\AppData\Roaming\Stellarium\data
In the data folder you will have a file called ssystem.ini
Right click it and select "edit with notepad++"
Scroll down the list and you will see a section that looks like this :-
[jupiter]
name = Jupiter
parent = Sun
radius = 71492
oblateness = 0.064874
halo = true
color = 1.0,0.97,0.89
tex_map = jupiter.png #texture courtesy of Björn Jónsson
tex_halo = star16x16.png
coord_func = jupiter_special
lighting = true
albedo = 0.51
rot_periode = 9.927953
rot_rotation_offset = 105 #just some value good for GRS #old:151
#rot_obliquity = 2.222461
#rot_equator_ascending_node = -22.203
rot_pole_ra = 268.05
rot_pole_de = 64.49
orbit_visualization_period = 4331.87
atmosphere = 1
The part you want, is "rot_rotation_offset = 250".
Change the '250' to '65' and then at the top left in notepad++ click FILE and then SAVE. Close notepad++ and start stellarium.
**Please note that Dion successfully used the figure of 105, and other users have found different figures that worked for them, so a bit of trial and error may be required. However, I eventually came up with the figure of 65 that worked for me**
Advance the time in stellarium to a time when the above site says there should be a transit, zoom in on Jupiter in Stellarium and now the GRS should be placed around the middle.
All done


