Sunday, February 22, 2015

The Rosette Nebula


With a clear sky forecast all night last night, I decided to have a go at imaging something new last. A quick look at Stellarium showed that the beautiful NGC2237 - otherwise known as The Rosette Nebula - was perfectly positioned in the sky. So, with my son to assist, I set-up the scope and had the target centred in my field of view within 20 minutes. After ensuring the focussing was okay I initiated a series of 14 x 900s exposures, using Nebulosity 3 to control the QHY8L CCD attached to my Altair Astro Wave 115 triplet refractor. I initially tried a medium 'dither' between shots - this basically moves the scope a little between each shot to try and minimise any backlash in the mount, but it took ages to settle down for the next exposure so I cancelled that and re-started without the 'dither' option selected.

With over 3 hours of data to collect, we retired inside to keep warm and left it running. Once the imaging run was complete I decided to have a go at capturing some 'Flats'. I have not used them before, but I have a few dust spots on my optics somewhere and I was given some good advice on Stargazerslounge last week about using Flat frames to get rid of them, so I thought I'd give it a go. I don't have a light panel, but my iPad screen with a sheet of paper in-front of it to defuse the light, seemed to work well enough.

When it came to processing the image the Flats and Darks made a good job of getting rid of a lot of artifices, although there were still some that needed removing manually. It was also at this stage that I realised that having stopped the session to turn of the 'dither' option, my focussing wasn't as spot on after I restarted. As a result, the Stars were not as sharp as I would have liked. I also have doubts about the field flattener - it is probably something to do with the spacing between flattener and CCD, which needs to be accurate down to a very small tolerance - more work required there I think. However, after a little processing in Photoshop, the final result is actually fairly reasonable I think.

The Rosette Nebula (NGC2237)
The Rosette Nebula (NGC2237) - 14 x 900s, Altair Wave 115 Triplet and QHY8L


Tuesday, February 17, 2015

Catching the GRS!


Having fixed the rotation of Jupiter in Stellarium a couple of nights ago - see my previous posts - I noticed that there was a convenient Great Red Spot (GRS) transit this evening to test the software out, so I went out with the specific intention of checking that the prediction was accurate.

After slewing my Altair Wave 115 refractor to the rough position of Jupiter using Stellarium, I accurately aligned the system using AstroTortilla and there it was - I had Jupiter slap bang in the middle of my field of view. I then swapped my camera for the QHY IMG132E planetary camera and added the Tele Vue 2 x Powermate for extra magnification. After a little playing around with the focusing I could clearly see the GRS at meridian, meaning that Stellarium had accurately predicted the transit.

The image below is the result of the best 400 frames from an 87s AVI, stacked using AutoStakkert 2 and processed in RegiStax 6. Not a bad image for a 4.5" refractor! - click on the image to see a better quality version on flickr.

Jupiter, Io and Callisto - 17 Feb
Jupiter and the Great Red Spot, with 2 of Jupiter's moons - Io (bottom) and Callisto (top)

Feeling Crabby!


Despite not feeling particularly well yesterday, the forecast of no moon and a clear sky all night provided an opportunity to test out my new Altair Wave 115 refractor on a deep sky object that could not be missed. So, as the sun dropped below the horizon I started moving my gear outside and setting up for an imaging session.  Once everything was setup and balanced correctly, I selected the Crab Nebula (M1) in Stellarium and slewed the scope to roughly the right location. I then used AstroTortilla to do a quick plate solving routine that established the accurate position of my scope and automatically re-centred on the right point in the sky - I love this software - so much easier than messing about with alignment stars.

Once it was dark enough to start a proper imaging run, I used Nebulosity 3 to instruct my QHY8L CCD to take 15 x 300s exposures, relying on PHD2 to accurately guide my scope through my Starlight XPress Lodestar camera and TS off-axis guider.  I then retired indoors for a nice warm drink, where I was able to monitor the progress via screen sharing on my iMac. Once the session had finished I went back outside and packed everything away.  I then went to bed - I wasn't feeling well after all.

The following morning, I reviewed the images and was pleased that only 1 image needed to be discarded.  I then used Nebulosity 3 to apply the dark callibration frames to the 14 remaining images before stacking. The result was a relatively noise free, although faint, image of the nebula, but most surprisingly, was the flatness of the image compared to those I got from my previous scope - the Sky-Watcher Explorer 190MN Pro.  With the exception of 1 corner, the stars seemed perfectly round across the image and there was no vignetting or background gradient at all.  Application of Neil Heacock's processing workflow, using Photoshop CS6 and Noel Carboni's Astronomy Tools resulted in a very nice looking image, with a stunning array of stars and a lovely structure to the filaments of the nebula. Overall, a pleasing result from my new scope.

The Crab Nebula (M1)
M1 The Crab Nebula - 16 Feb 2015


The Crab Nebula (M1) - Cropped
Cropped version of the same image, showing a closer view of the nebula

Saturday, February 14, 2015

Fixing Jupiter's Rotation in Stellarium


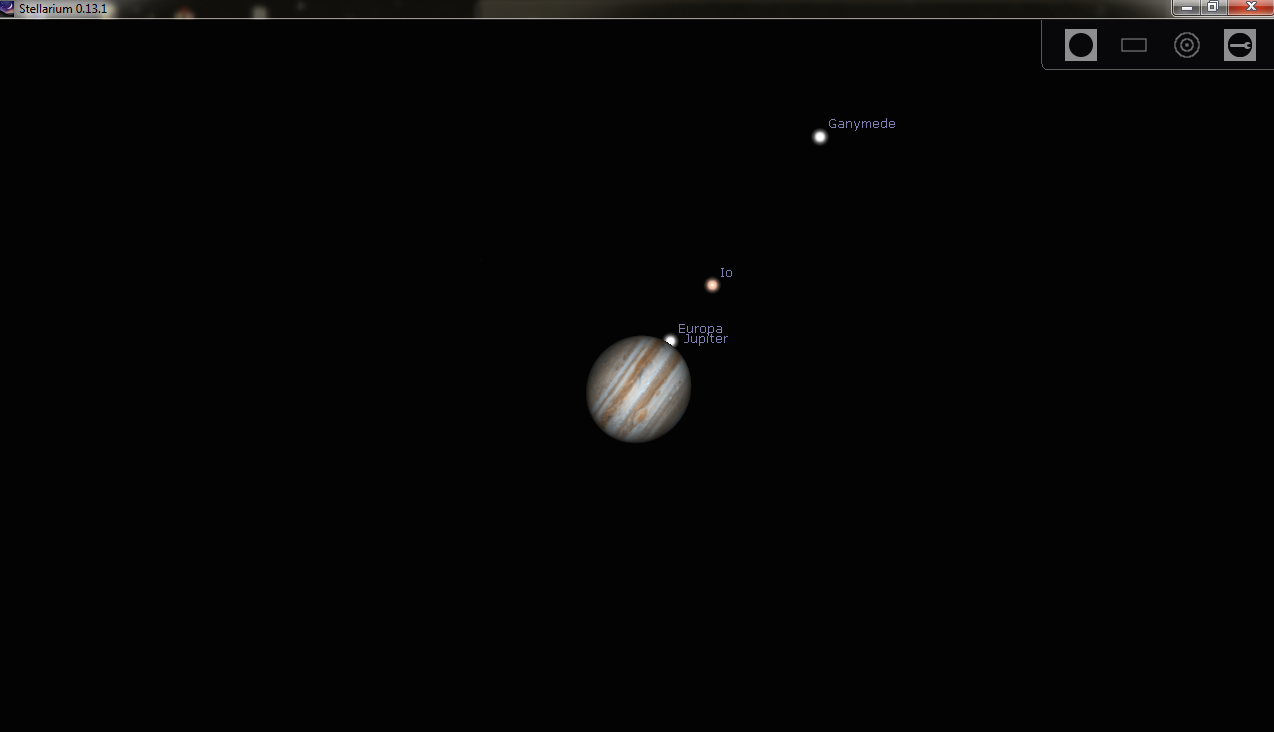
I really like Stellarium, having recently started using it to control my scope through EQMod. It is great for scanning the night sky for suitable targets and even lets you zoom in to the planets to see the location of their moons.  What i didn't realise, until recently, is that the surface image of Jupiter showing the Great Red Spot (GRS) does not tie in with the real time rotation of the planet - how frustrating!  However, last night I discovered a work-around that allows you to adjust the rotation speed of the image in Stellarium to correspond with real time, meaning you can use this excellent planetarium software to predict the best time for observing GRS transits.

A Stellarium screenshot showing Jupiter, her moons and the Great Red Spot transit


Many thanks to Dion (of AstronomyShed fame) who provided the original instructions on the East Midlands Stargazers website http://www.eastmidlandsstargazers.org.uk/topic/198-grs-in-stellarium/ 
I have made a slight amendment based on my own system - Windows 7 Ultimate and Stellarium 0.13.1.

Firstly, download a program called 'notepad++' as this is far better for editing code. If you use the default text editor you just end up with a large block of code that is difficult to decipher. Notepad++ can be downloaded from here :-

http://notepad-plus-plus.org/

Once installed, you're going to just have a quick check of a website for transit times, so put in your correct time zone here :-

http://www.skyandtel...html?page=1&c=y

This will tell you when the red spot transits Jupiters meridian, ie, it's in the middle. So make a note of the times, all you need this for is to double check your edits have worked ok.

Next, go to the following location on your hard drive:

C:Users\<folder with computer name or your name>\AppData\Roaming\Stellarium\data

In the data folder you will have a file called ssystem.ini

Right click it and select "edit with notepad++"

Scroll down the list and you will see a section that looks like this :-

[jupiter]
name = Jupiter
parent = Sun
radius = 71492
oblateness = 0.064874
halo = true
color = 1.0,0.97,0.89
tex_map = jupiter.png #texture courtesy of Björn Jónsson
tex_halo = star16x16.png
coord_func = jupiter_special
lighting = true
albedo = 0.51
rot_periode = 9.927953
rot_rotation_offset = 105 #just some value good for GRS #old:151
#rot_obliquity = 2.222461
#rot_equator_ascending_node = -22.203
rot_pole_ra = 268.05
rot_pole_de = 64.49
orbit_visualization_period = 4331.87
atmosphere = 1

The part you want, is "rot_rotation_offset = 250".

Change the '250' to '65' and then at the top left in notepad++ click FILE and then SAVE. Close notepad++ and start stellarium.

**Please note that Dion successfully used the figure of 105, and other users have found different figures that worked for them, so a bit of trial and error may be required. However, I eventually came up with the figure of 65 that worked for me**

Advance the time in stellarium to a time when the above site says there should be a transit, zoom in on Jupiter in Stellarium and now the GRS should be placed around the middle.

All done

Sunday, February 08, 2015

Jupiter and Europa


After a long run of bad weather I finally managed to get outside this evening and do a little imaging with my new scope - the Altair Astro Wave Series 115 ED F7 Triplet refractor.
After an initial alignment using Astrotortilla, I swapped the main camera for my QHY IMG132E planetary imaging camera together with a Tele Vue 2x Powermate and slew the scope to Jupiter. After focussing as best as I could I was quite impressed with how much detail I could see on my laptop screen and how little atmospheric distortion there was - a particularly rare still night. I then set about capturing several 89 second AVI files, averaging 20fps, which although significantly less than than the camera is capable of is about as much as my system will allow.
Once back inside (it was -2 outside) I set about processing the files. Firstly I stacked them using AutoStakkert 2 - taking the best 50% of the frames to make a single image. I then loaded it in RegiStax 6 and auto aligned and balanced the colour to get rid of a slight blue tinge on one side of the planet. I then adjusted the wavelets, which is a process that pulls out the finer detail in the planet's surface - I don't know how it works, but it does the job!
Jupiter and Europa - 8 Feb 15