Tuesday, February 17, 2015

Catching the GRS!


Having fixed the rotation of Jupiter in Stellarium a couple of nights ago - see my previous posts - I noticed that there was a convenient Great Red Spot (GRS) transit this evening to test the software out, so I went out with the specific intention of checking that the prediction was accurate.

After slewing my Altair Wave 115 refractor to the rough position of Jupiter using Stellarium, I accurately aligned the system using AstroTortilla and there it was - I had Jupiter slap bang in the middle of my field of view. I then swapped my camera for the QHY IMG132E planetary camera and added the Tele Vue 2 x Powermate for extra magnification. After a little playing around with the focusing I could clearly see the GRS at meridian, meaning that Stellarium had accurately predicted the transit.

The image below is the result of the best 400 frames from an 87s AVI, stacked using AutoStakkert 2 and processed in RegiStax 6. Not a bad image for a 4.5" refractor! - click on the image to see a better quality version on flickr.

Jupiter, Io and Callisto - 17 Feb
Jupiter and the Great Red Spot, with 2 of Jupiter's moons - Io (bottom) and Callisto (top)

Feeling Crabby!


Despite not feeling particularly well yesterday, the forecast of no moon and a clear sky all night provided an opportunity to test out my new Altair Wave 115 refractor on a deep sky object that could not be missed. So, as the sun dropped below the horizon I started moving my gear outside and setting up for an imaging session.  Once everything was setup and balanced correctly, I selected the Crab Nebula (M1) in Stellarium and slewed the scope to roughly the right location. I then used AstroTortilla to do a quick plate solving routine that established the accurate position of my scope and automatically re-centred on the right point in the sky - I love this software - so much easier than messing about with alignment stars.

Once it was dark enough to start a proper imaging run, I used Nebulosity 3 to instruct my QHY8L CCD to take 15 x 300s exposures, relying on PHD2 to accurately guide my scope through my Starlight XPress Lodestar camera and TS off-axis guider.  I then retired indoors for a nice warm drink, where I was able to monitor the progress via screen sharing on my iMac. Once the session had finished I went back outside and packed everything away.  I then went to bed - I wasn't feeling well after all.

The following morning, I reviewed the images and was pleased that only 1 image needed to be discarded.  I then used Nebulosity 3 to apply the dark callibration frames to the 14 remaining images before stacking. The result was a relatively noise free, although faint, image of the nebula, but most surprisingly, was the flatness of the image compared to those I got from my previous scope - the Sky-Watcher Explorer 190MN Pro.  With the exception of 1 corner, the stars seemed perfectly round across the image and there was no vignetting or background gradient at all.  Application of Neil Heacock's processing workflow, using Photoshop CS6 and Noel Carboni's Astronomy Tools resulted in a very nice looking image, with a stunning array of stars and a lovely structure to the filaments of the nebula. Overall, a pleasing result from my new scope.

The Crab Nebula (M1)
M1 The Crab Nebula - 16 Feb 2015


The Crab Nebula (M1) - Cropped
Cropped version of the same image, showing a closer view of the nebula

Saturday, February 14, 2015

Fixing Jupiter's Rotation in Stellarium


I really like Stellarium, having recently started using it to control my scope through EQMod. It is great for scanning the night sky for suitable targets and even lets you zoom in to the planets to see the location of their moons.  What i didn't realise, until recently, is that the surface image of Jupiter showing the Great Red Spot (GRS) does not tie in with the real time rotation of the planet - how frustrating!  However, last night I discovered a work-around that allows you to adjust the rotation speed of the image in Stellarium to correspond with real time, meaning you can use this excellent planetarium software to predict the best time for observing GRS transits.

A Stellarium screenshot showing Jupiter, her moons and the Great Red Spot transit


Many thanks to Dion (of AstronomyShed fame) who provided the original instructions on the East Midlands Stargazers website http://www.eastmidlandsstargazers.org.uk/topic/198-grs-in-stellarium/ 
I have made a slight amendment based on my own system - Windows 7 Ultimate and Stellarium 0.13.1.

Firstly, download a program called 'notepad++' as this is far better for editing code. If you use the default text editor you just end up with a large block of code that is difficult to decipher. Notepad++ can be downloaded from here :-

http://notepad-plus-plus.org/

Once installed, you're going to just have a quick check of a website for transit times, so put in your correct time zone here :-

http://www.skyandtel...html?page=1&c=y

This will tell you when the red spot transits Jupiters meridian, ie, it's in the middle. So make a note of the times, all you need this for is to double check your edits have worked ok.

Next, go to the following location on your hard drive:

C:Users\<folder with computer name or your name>\AppData\Roaming\Stellarium\data

In the data folder you will have a file called ssystem.ini

Right click it and select "edit with notepad++"

Scroll down the list and you will see a section that looks like this :-

[jupiter]
name = Jupiter
parent = Sun
radius = 71492
oblateness = 0.064874
halo = true
color = 1.0,0.97,0.89
tex_map = jupiter.png #texture courtesy of Björn Jónsson
tex_halo = star16x16.png
coord_func = jupiter_special
lighting = true
albedo = 0.51
rot_periode = 9.927953
rot_rotation_offset = 105 #just some value good for GRS #old:151
#rot_obliquity = 2.222461
#rot_equator_ascending_node = -22.203
rot_pole_ra = 268.05
rot_pole_de = 64.49
orbit_visualization_period = 4331.87
atmosphere = 1

The part you want, is "rot_rotation_offset = 250".

Change the '250' to '65' and then at the top left in notepad++ click FILE and then SAVE. Close notepad++ and start stellarium.

**Please note that Dion successfully used the figure of 105, and other users have found different figures that worked for them, so a bit of trial and error may be required. However, I eventually came up with the figure of 65 that worked for me**

Advance the time in stellarium to a time when the above site says there should be a transit, zoom in on Jupiter in Stellarium and now the GRS should be placed around the middle.

All done

Sunday, February 08, 2015

Jupiter and Europa


After a long run of bad weather I finally managed to get outside this evening and do a little imaging with my new scope - the Altair Astro Wave Series 115 ED F7 Triplet refractor.
After an initial alignment using Astrotortilla, I swapped the main camera for my QHY IMG132E planetary imaging camera together with a Tele Vue 2x Powermate and slew the scope to Jupiter. After focussing as best as I could I was quite impressed with how much detail I could see on my laptop screen and how little atmospheric distortion there was - a particularly rare still night. I then set about capturing several 89 second AVI files, averaging 20fps, which although significantly less than than the camera is capable of is about as much as my system will allow.
Once back inside (it was -2 outside) I set about processing the files. Firstly I stacked them using AutoStakkert 2 - taking the best 50% of the frames to make a single image. I then loaded it in RegiStax 6 and auto aligned and balanced the colour to get rid of a slight blue tinge on one side of the planet. I then adjusted the wavelets, which is a process that pulls out the finer detail in the planet's surface - I don't know how it works, but it does the job!
Jupiter and Europa - 8 Feb 15

Monday, May 26, 2014

M13 The Great Globular Cluster - Lacking Colour


Sometimes things don't quite work out as expected. My latest image - M13 The Great Cluster in the constellation Hercules - is the first image I have taken for a while and the first taken using an Off Axis Guider instead of a guide scope. This should have been enough to warn against making too many changes, but I also decided to try out the latest version of Nebulosity 3. I used to use Nebulosity 3 as my camera control software with my Canon EOS, but when I upgraded to the QHY8L CCD it wasn't compatible so I started using EZCap - the software that comes bundled with QHY CCD cameras. However, the newest version of Nebulosity now supports the QHY8L so I thought I'd give it a go and I actually got on really well with it - until it came to processing. I'm not sure what went wrong, but my images seem to lack colour. There is a hint of it in there, but not enough to show the amazing blue and red stars in this beautiful cluster.

M13 - The Great Cluster

The image was captured using my QHY8L camera attached to a Sky-Watcher Explorer 190MN Pro, guided using an Off Axis Guider and Starlight Xpress Lodestar guide camera. It is the result of 10 x 180s images, captured and stacked in Nebulosity 3 and processed in Photoshop CS6. I believe that Nebulosity may have automatically debayered the image prior to saving it to disk - obviously the settings must have been wrong. Whilst it is a lovely image, showing lots of detail in the cluster, I can't wait to try again. Next time I will do a sample run with Nebulosity to see if I can get it working, otherwise I will have to revert to EZCap.

Saturday, May 24, 2014

Tuesday, November 12, 2013

M42 Orion Nebula - First Light With The QHY8L


After what seemed like a long wait, I finally had a clear night this week and managed to get first light with the QHY8L that I purchased second hand on astrobuysell.com. The target was M42 (the Orion Nebula) and I have to say that I am quite pleased with the result. The image was captured using the QHY8L camera, cooled to -20 degrees, and attached to a Sky-Watcher Explorer 190MN Pro. The image consists of 10 x 200s and 10 x 45s exposures, captured using the QHY EZCAP software, with initial processing and stacking in Nebulosity 3 and final processing in Photoshop CS6. Equipment used is the Sky-Watcher Explorer 190MN Pro, mounted on a NEQ6 with a 2" Hutech IDAS LPS P2 filter to enhance contrast and reduce the effect of light pollution.

The Orion Nebula (M42)
M42 Orion Nebula

The shorter exposures were important so that the Trapezium (tight group of 4 bright stars in the core) did not become blown out. However, the longer exposures are important to capture the finer detail of the nebulosity. 

Saturday, October 26, 2013

The QHY8L Cooled CCD Review


I have achieved some good results with my modified DSLR, but controlling noise has always been difficult and has often limited the amount of faint detail I have been able to draw out. So I have decided to take the next step up and purchase a cooled CCD camera.

The advantage of these specialist cameras is that you can actively cool the CCD sensor down to well below 0 degrees, which dramatically reduces thermal noise in the final image and makes processing far easier. But, before rushing out and spending my hard earned money I first needed to decide whether to go for a Mono or One Shot Colour (OSC) camera. Mono cameras are far more sensitive, as each pixel picks up 100% of the incoming light, whereas the bayer matrix in a OSC means only about 33% of the incoming light makes it through to a specific pixel. However, there are disadvantages to the Mono camera - each imaging session requires three times the number of images, as the image needs to be separately captured using red, green and blue filters, which are then combined during processing to create the final color image. With the unpredictable weather in the UK, I wasn't sure this would always be achievable and I didn't want to have to split my imaging sessions over multiple nights (I'm not that patient). The other disadvantage with the Mono is the cost - a OSC camera is ready to go straight out of the box, whereas a Mono camera requires additional filters and a filter wheel, which can add a few hundred pounds to the price. So, for me the decision was fairly simple - I opted for a OSC camera. Maybe in the future I will go down the route of Mono imaging, but for now I will keep things simple.

With that decision made, it was a case of finding an affordable camera with a reasonably good sized sensor. Having been used to the large sensor on my DSLR, I did not want to dramatically downsize, but in the world of CCD cameras large sensors are usually very expensive. However, my research soon led me to the reasonably priced QHY8L, which has a 1.8" CMOS sensor with an effective resolution of 3032 x 2016 pixels, with the 7.8um x 7.8um pixel size being ideal for high sensitivity deep space imaging. The camera is also capable of being cooled down to about 35 degrees below ambient temperature (-20 is the recommended operating temperature) which is more than adequate.

QHY8L fitted with my own light pollution filter
The main dealer for QHY cameras in the UK is Modern Astronomy, but I was fortunate enough to find a secondhand one on AstroBuySell last week for a very good price, so I finally decided to stop thinking about it and took the plunge. It arrived a couple of days ago and the first thing that struck me was the size - it's bigger than I expected from the pictures I had seen on the internet (slightly bigger than a coke can). That said, it is only about 400g, so isn't going to add too much weight to my setup. The build quality seems good to me, although some users have expressed concerns online that the connection ports on the rear seem a little fragile and may get damaged with the weight of the cables. There is a solution to this, which can be found online, but it seems okay to me. The nosepiece includes a built in IR cut filter, which protects the sensor from dust, but also has a standard T2 thread that allows attachment of an adapter or extension tube - I have a 2" Hutech IDAS LPS-P2 filter that I would not want to be without, so I have been able to attach it using this method, as seen in the photo. Also included with the camera is a desicant tube, that connects to the sensor chamber to deal with any moisture that may form.

When setting up the camera for an imaging session it is very important that you run through the setup procedure exactly as detailed in the user guide, otherwise you risk damaging the sensor.

1. Connect the USB cable to the back of the camera
2. Connect the USB cable to the computer
3. Start the bundled EZCap capture software and select the QHY8L from the drop down menu
4. Connect the 9 pin power lead to the back of the camera
5. Connect the 9pin power lead to the DC201 power adaptor
6. Connect the mains power supply to the DC201 power adaptor

Once power is applied you'll hear the cooling system whir into action - it isn't excessive, but it's certainly not silent. You'll then need to set the desired cooling temperature and give it 5 minutes to settle down before starting the imaging session. I will go into more detail on the EZCap software in another entry, but I have found it to be comprehensive and easy to use.

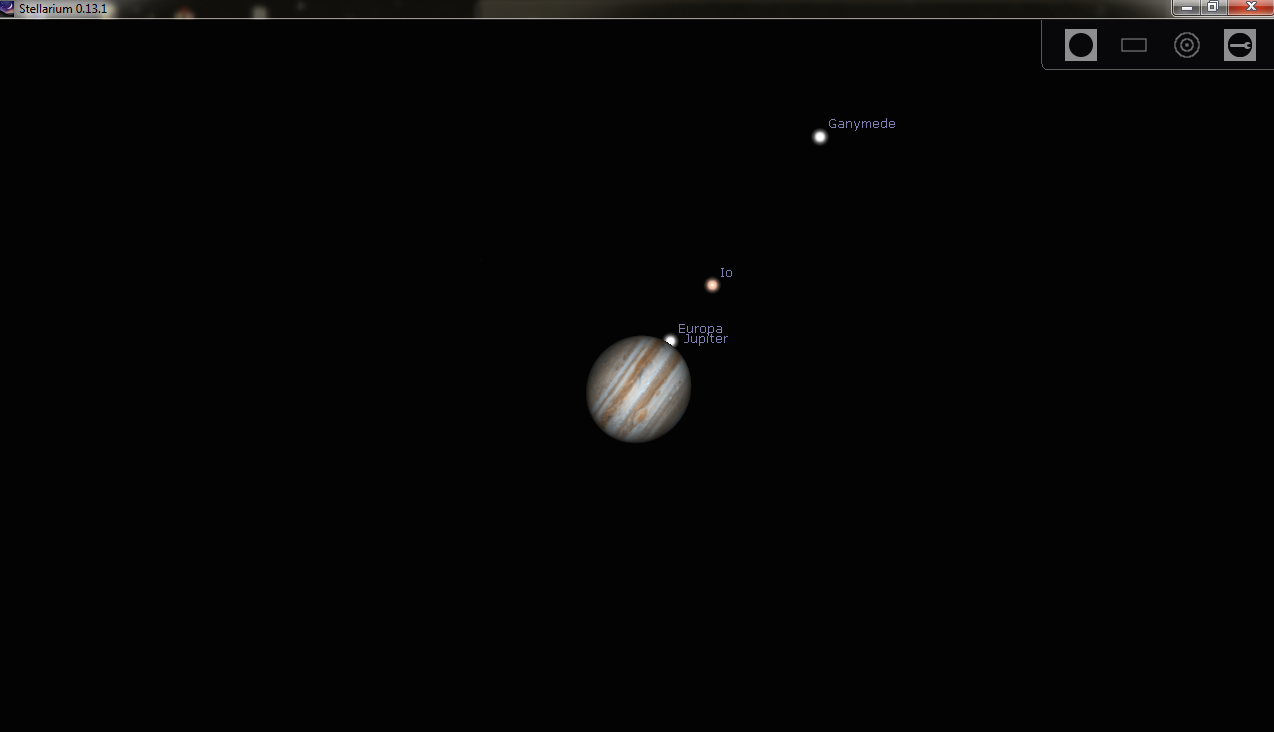
As far as the camera's performance goes, I have been very impressed so far with the test images captured using the QHY8L, although I did notice a big difference in the colours compared to my DSLR - a little less blue/purple than I was used to. However, I will have to wait for clearer skies to do a proper test run.

In the meantime I will start working on building up a library of dark files. This is another advantage to a set point cooling system - the camera can be left in the garage or shed overnight, capturing dark images for the commonly used exposure lengths. If you remember, with a non-cooled camera dark files need to be captured after each imaging session, because they need to be captured at the same temperature as the lights. But, with a cooled CCD, the temperature is set by the user so will ideally always be the same (-20 is recommended for the QHY8L). This means you can use the same library of dark files over and over again, which is great news for those who don't like hanging around in the cold for another hour at the end of the main imaging session.

Overall, my first impression of this camera is very good. It is a well built camera for the price, with a good sized sensor that should potentially be capable of delivering some very good results.

Sunday, October 06, 2013

Three Images In One Night


The trouble with being an amateur astronomer in the UK is the reliability of the weather. On more than a handful of occasions, I have spent an hour or so meticulously setting up the scope, framing my image and calibrating the guide camera, only to find the clouds have rolled in before I have managed to capture a single image.  So I could not believe my luck last night, when surprisingly, the forecast was accurate and we were blessed with an extremely clear and still night. The result was not one, but three images.

Firstly, The Ring Nebula (M57), which is a planetary nebula in the constellation of Lyra and is approximately 2,300 light years from earth. It was formed when a shell of ionized gas was expelled by a giant red star, during its dying transformation into a white dwarf. The image comprises 16 x 120s exposures.
 
The Ring Nebula (M57)

Next was Pleiades, or the Seven Sisters (M45), which is an open star cluster located in the constellation Taurus and is approximately 380 light years from Earth. This image comprises 4 x 200s exposures.

Pleiades (M45)

Finally, the most difficult of the three to capture - The Eagle Nebula (M16), which is an open star cluster and diffuse emission nebula in the constellation Serpens and is approximately 7,000 light years from Earth. Within it are several star forming gas and dust regions, including the famous 'Pillars of Creation'. This image comprises 9 x 200s exposures.

The Eagle Nebula (M16)

All three images are the result of multiple exposures, captured using my astro-moddified Canon EOS 1000D, attached to my Sky-Watcher Explorer 190MN Pro. A 2" Hutech IDAS LPS P2 filter was used to enhance contrast and reduce the effect of light pollution, which makes the faint areas of nebulosity easier to process. Once calibrated and stacked using Nebulosity 3 the images were processed using Adobe Photoshop CS6.

Considering all three images were the result of one night under the stars, I am really pleased with the outcome. Had I spent longer on each subject, in order to capture more expsoures, the result would have been even better, but that can wait for another night!

Tuesday, September 10, 2013

Getting Started: Learning The Night Sky


Astronomy is a fascinating hobby for the beginner and doesn't necessarily require complicated or expensive equipment to get started. Equipped with nothing more than the naked eye, a map of the stars and an inquisitive mind it is possible to observe many fascinating features of the night sky. Once you are ready to take the next step, a good pair of binoculars is often a much better investment than a similarly priced telescope. Binoculars are simple to use and readily available and will provide you with an excellent view of the moon and planets; constellations; meteor showers and even the odd deep space object. In fact, this is probably the best way to start - it allows you to learn the night sky and navigate easily to points of interest.
A view of Orion from my suburban, light-polluted, garden
There are plenty of books and magazines that you can use to help you find your way around; 'Philip's Stargazing 2013' or a 'Philip's Planisphere' are both popular choices, however, I would particularly recommend 'Turn Left At Orion' by Guy Consolmagno and Dan M. Davis. Written specifically for beginners, it is the perfect reference book for the amateur astronomer, providing easy to follow instructions on how to find the most common celestial objects as well as illustrating how they will appear through low and high powered scopes.

For the more technically minded, there are some excellent interactive planetarium applications available for the home computer, providing a 3D view of the night sky based on the date, time and location. Stellarium is a free application for Windows, Mac and Linux and is extremely popular due to its ease of use and the number of advanced features it boasts, including telescope control, large object databases and detailed information about the objects you may wish to view.

A screenshot from Stellarium
As most people probably don't want to be setting up their home computer out in the garden, there are a number of excellent mobile planetarium Apps available for smartphone and tablet devices, that provide a highly portable interactive sky map. The more advanced of these Apps provide a similar level of features to the free desktop applications, making them a useful tool when trying to find a particular object in the night sky.

Remember, learning your way around the constellations is a fascinating way to start observing the night sky and does not require anything more complicated than a map of the stars and a pair of binoculars. If you do decide to take things further, learning to navigate the stars from the beginning will help you out immensely when you eventually decide to take the plunge and buy your first scope.

Sunday, September 01, 2013

Capturing and Processing Andromeda


I think this has to be my favourite image so far - captured last night from my back garden using my astro-moddified Canon EOS 1000D, attached to my Sky-Watcher Explorer 190MN Pro. The image is of our close neighbour - the Andromeda Galaxy (M31) - and is the result of almost 90 minutes of exposures (5 x 5min + 30 x 2min), aligned and stacked using Nebulosity 3 and processed using Adobe Photoshop CS6.

The Andomeda Galaxy (M31)
Having initially aligned and stacked the images in Nebulosity 3, I exported the stacked image as a 16 bit TIFF file so that I can process it in Adobe Photoshop CS6 - it is important to remember that at this stage the majority of the finer detail is obscured, so we need to do some tweaking in order to get a nice clean result.

Unprocessed image of M31 after initial alignment and stacking
Without going into too much detail, there are a several stages that we need to perform on this image in order to get it to look like the one at the top of this post. Many thanks to Neil Heacock for sharing his workflow online for others to use.

  1. Adjust levels and curves - effectively, we want to ensure the image is not clipped whilst enhancing the lighter areas of the image so they show up more in contrast to the darker background.
  2. Apply gradient filter - I use Russell Croman's Gradient XTerminator, which is a paid-for plug-in filter for Adobe Photoshop CS6. This basically reduces vignetting in the image that can result in significant colour gradient across the image - especially in the corners.
  3. Apply Local Contrast Enhancement action - this is the first of Noel Carboni's Astronomy Tools for Photoshop. Again, you'll need to purchase these tools, that are effectively a set of pre-programmed actions, but they are an invaluable tool and will deliver excellent results whilst saving you significant time and effort. The purpose of running the Local Contrast Enhancement action is to enhance the contrast between the cloudy elements of the galaxy and the darker dust lanes.
  4. Apply Enhance DSO Reduce Stars action - another of Noel Carboni's tools, this one increases the lighter areas of nebulosity without increasing the brighter portions of the image, increasing brightness without over exposing the stars.
  5. Increase Saturation - this enhances the colour of stars and dust lanes in the galaxy. be careful not to go overboard with this - you do not want the image looking over processed.
  6. Apply Noise Reduction. Another of Noel Carboni's tools - I told you they were invaluable. There are two versions available in his set of tools. Space Noise Reduction (SNR) and Deep Space Noise Reduction (DSNR). SNR will reduce the effect of noise across the entire image, whilst DSNR will leave the brighter areas alone and just reduce the effect of noise in the background. In the image above I used SNR initially, as I had a little noise in the nebulosity, then ran DSNR to further reduce the noise in the background.
  7. Apply the Smart Sharpen filter - if applied to the highlights, whilst filtering the shadow areas, this filter does a nice job of sharpening the detail in the nebulosity and dust lanes without re-adding noise to the overall image.
  8. Apply Less Crunchy More Fuzzy action - the last of Noel Carboni's tools that we need for this image, this adds a little blur to the nebulosity areas, adding the final layer of polish to your image.